
DIY Silicone Bead Keychain Tutorial: 2026 Guide
Table of Contents
- DIY Silicone Bead Keychain Tutorial: Supplies You'll Need
- Choosing the Best Cord for Silicone Bead Keychains
- Step-by-Step Silicone Bead Keychain Assembly
- Silicone Bead Keychain Knot Tutorial: Secure Finishes
- Design Ideas: Color Blocking and Focal Beads
- How to Clean Silicone Beads and Keep Them Looking New
- Common Mistakes to Avoid and Durability Tips
- Final Thoughts on Your Silicone Bead Keychain Project
- Frequently Asked Questions
Last Updated: September 7, 2026
Silicone bead keychains have become one of the most popular DIY crafts for good reason: they are quick to assemble, endlessly customizable, and durable enough for daily use. A diy silicone bead keychain tutorial 2026 doesn't need to be complicated, but getting the details right makes the difference between a trinket that falls apart in a week and an accessory that lasts for years. At Barkers Creative Designs, we supply silicone beads and keychain hardware to crafters at every level. The real challenge isn't threading beads; it's choosing materials that work together and finishing with a knot that holds. Below, we'll walk through the full process, from supplies to final assembly, so your keychain survives real-world use.

DIY Silicone Bead Keychain Tutorial: Supplies You'll Need
A successful project starts with the right components. For a standard wristlet keychain, you need silicone beads in your chosen size, a durable cord, and a keyring with a lobster clasp. Most crafters prefer 15mm beads because they sit comfortably in the hand and show off color patterns clearly. A beadable bar keychain gives you a rigid base to arrange beads along, while a simple silver keyring with a lobster clasp works when you want beads threaded directly onto the cord. You will also want a pair of sharp scissors for trimming cord ends.

Choosing the Best Cord for Silicone Bead Keychains
The best cord for silicone bead keychains is a stretch cord or nylon cord, and the choice depends on how you plan to use the finished piece. Stretch cord, usually elastic, lets you slip the keychain on and off without a clasp, which makes it ideal for cup charms or pen toppers. Nylon cord is stronger and better suited for keychains that will see daily wear in pockets or bags. Look for a cord thickness around 1mm so it passes through the bead hole twice for a secure finish. Avoid cotton or fraying materials, as they weaken quickly at the knot.
Step-by-Step Silicone Bead Keychain Assembly
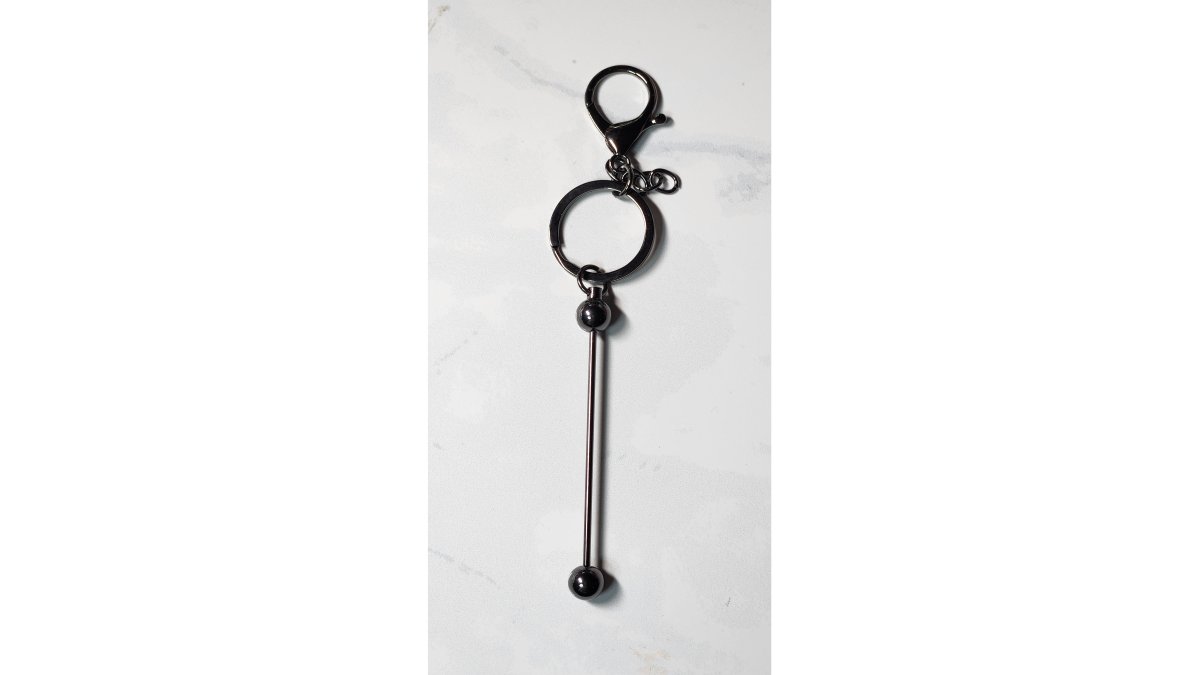
Assembly takes about ten minutes once your supplies are ready. Start by cutting a 12-inch length of cord, which gives you enough slack to work with while keeping the finished loop tidy. Thread your keyring or bar keychain onto the cord first, centering it so both ends hang evenly. Then begin adding beads, alternating colors or following your planned pattern. Work the beads down snugly but leave a little room so the keychain bends naturally. When your design is complete, you will have two cord ends ready for knotting.
Silicone Bead Keychain Knot Tutorial: Secure Finishes
A silicone bead keychain knot tutorial always comes back to one rule: the knot is the weakest point, so give it the most attention. Most tutorials stop at "tie a knot," but that's where keychains fail. Here's how to finish so your piece survives real-world tugging, pocket wear, and repeated drops.
The Surgeon's Knot: Why It Beats a Square Knot
The strongest method is the surgeon's knot, which adds an extra pass through the loop compared to a standard knot. Here's the exact sequence:
- Cross the two cord ends, right over left.
- Wrap the right end around the left end twice (not once).
- Pull both ends tight to seat the first half of the knot.
- Cross the ends again, left over right, and wrap twice more.
- Pull firmly until the knot cinches down against the beads.
This double-wrap on each pass creates more friction surface area than a square knot, which is why it holds better on smooth nylon cord. A square knot has roughly half the contact area and can slip under repeated tension.
The Pull Test: Verify Before You Trim
Before trimming, perform a pull test. Hold the bead closest to the knot with one hand and the keyring with the other. Pull with steady, firm pressure, about what you'd use to yank a stuck zipper. The knot should not slide or loosen. Then give the cord a sharp jerk to simulate the kind of force a keychain sees when caught on a door handle or dropped on pavement. If the knot holds through both tests, you're ready to trim.
Trimming and Sealing for Longevity
Trim the tails close to the knot, leaving about 2mm to prevent slipping. Any shorter and the knot can unravel; any longer and the tails create a rough spot that catches on fabric. For nylon cord, you can melt the cut ends with a lighter flame held 1-2 seconds, just enough to create a small ball at the tip (the NIH). This prevents fraying and gives the knot extra bulk. For stretch cord, skip the flame and instead add a tiny drop of craft glue (E6000 or Beacon Fabri-Tac both work) to the knot before trimming. Let it dry for 10 minutes before using the keychain.
The Double-Knot Backup for High-Stress Pieces
For keychains that will carry heavy items, like a set of house keys or a car fob, add a third pass. After completing the surgeon's knot, tie one additional standard overhand knot on top. This creates a bulky but nearly unbreakable finish. Most crafters skip this step because it looks less clean, but for daily-use keychains, the extra bulk is invisible once the knot is tucked between two beads.
Testing Knot Security Across Cord Types
Different cords behave differently at the knot. Nylon cord (like 1mm round nylon) holds a surgeon's knot well because the material has slight texture. Stretch cord (elastic) requires the glue step above because elastic wants to return to its original shape, which can loosen a knot over time. Polyester cord is slicker and may need an extra wrap on each pass. If you're unsure about your cord, tie a test knot, pull hard, and check for slippage before committing to your full design.
Design Ideas: Color Blocking and Focal Beads
Color blocking is the easiest way to make your silicone bead keychain look intentional rather than random. Pick two or three colors that share a similar tone, then group them in sections of three to five beads each. A focal bead, such as a larger silicone focal or a character shape, breaks up the pattern and draws the eye. You can also add a 1.5 inch tassel to the keyring for movement and texture. Many crafters use the 20-bead packs of solid silicone beads in a single color to build clean, consistent blocks before mixing in accent pieces.

How to Clean Silicone Beads and Keep Them Looking New
Silicone beads resist dirt better than most craft materials, but they still collect oils from your hands over time. To clean them, remove the beads from the cord and soak them in warm water with a drop of mild dish soap. Swish them gently for a minute, then rinse thoroughly and lay them out to dry on a towel. Avoid harsh chemicals or abrasive scrubbers, which can dull the matte finish. Since the silicone is food-grade and non-toxic, this simple soap-and-water method is all you need to keep colors vibrant, whether the keychain is for you or for a child's backpack.
Common Mistakes to Avoid and Durability Tips
Most failed keychains trace back to two errors: using cord that is too thin and skipping the second knot. But there's a third, less obvious problem: choosing the wrong grade of silicone bead. Here's what separates a keychain that lasts from one that degrades in months.
Food-Grade vs. Standard Silicone: What Actually Matters
Silicone beads come in two broad grades: standard craft silicone and food-grade silicone. The difference matters more than most tutorials acknowledge. Food-grade silicone (often labeled as such on packaging) is manufactured without fillers or plasticizers, which means it resists oil absorption, doesn't degrade from hand lotion or sunscreen, and maintains its color over time (the FDA). Standard craft silicone may contain fillers that make beads feel softer initially but cause them to become sticky or dull after prolonged skin contact.
For keychains that will live in a pocket or purse, touching keys, coins, and hands daily, food-grade silicone is worth the small price premium. Given that a finished keychain takes 10 minutes to assemble, spending an extra dollar on beads that won't degrade is a reasonable trade-off.
How to Spot Low-Quality Silicone Before You Buy
You can test bead quality at home. Squeeze a bead between your thumb and forefinger. Quality silicone springs back immediately with no visible deformation. Low-grade silicone with fillers will show a slight dent or take a moment to recover. Also check the bead hole, quality beads have clean, uniform holes without flashing or rough edges. Rough holes can abrade your cord from the inside, causing premature breakage at the bead-cord interface.
The Real Cost of Cheap Cord
Cord is where most crafters try to save money, and it's the worst place to cut corners. There is no meaningful cost savings in buying bargain cord, but there is a significant durability penalty. Thin or low-quality cord stretches, frays, and snaps at the knot. Spend the $3 on quality cord and eliminate the most common failure point.
Overloading: The Design Mistake That Shortens Lifespan
Another common mistake is overloading the keychain with too many beads, which puts strain on the cord and makes the piece bulky. Keep your design to a comfortable length, usually 10 to 15 beads for a wristlet. Each bead adds weight and stress to the knot. A 15mm silicone bead weighs approximately 2 grams; a 15-bead keychain carries about 30 grams of bead weight plus hardware (PubMed). That's well within the safe range for 1mm nylon cord, but only if the knot is secure. Overloading beyond 20 beads increases leverage on the knot and accelerates wear.
Selling Your Creations: What to Check Before You List
If you are selling your creations or making gifts, test each keychain by pulling on both ends of the finished loop before you call it done. For items you sell, consider adding a small card noting that the keychain uses food-grade silicone and a secure surgeon's knot, this justifies a higher price point and builds buyer confidence. Your materials cost is roughly $2-3 per keychain, leaving a healthy margin if you factor in 10-15 minutes of assembly time.
Final Thoughts on Your Silicone Bead Keychain Project
A well-made silicone bead keychain balances three things: quality materials, a secure knot, and a design that reflects your style. Start with a beadable bar keychain or a silver keyring with a lobster clasp, choose a cord that matches how the piece will be used, and never rush the finishing knot. Barkers Creative Designs carries the 15mm solid silicone beads, focals, and hardware you need to build keychains that hold up, and our DIY kits take the guesswork out of pairing colors and components. Search our catalog for the supplies to start your next project.
Frequently Asked Questions
What type of cord is best for silicone bead keychains?
For a durable silicone bead keychain, use a nylon cord or a stretch cord. Nylon cord is strong, resists fraying, and holds a secure knot well, making it ideal for keychains that get daily use. Stretch cord is a good option for a snug fit but can degrade over time. Look for a cord thickness that fits comfortably through your bead holes, usually 1mm to 2mm, to ensure your beads slide on smoothly without being too loose.
How do you secure the knot on a silicone bead keychain?
The most reliable method is the surgeon's knot. After threading all your beads, cross the two cord ends and tie them once. Then, loop the ends through again before pulling tight. This creates a double knot that holds its shape. For extra security, add a small drop of clear craft glue or jewelry adhesive to the knot and let it dry completely before trimming the excess cord. This prevents the knot from slipping over time.
Are silicone bead keychains durable for daily use?
Yes, when made with quality materials. Food-grade silicone beads are soft, flexible, and resistant to wear and tear. The key to durability is your hardware and knot. Choose a sturdy metal keyring with a lobster clasp, like the silver keyring option, and use a strong nylon cord. A properly secured knot and quality hardware will ensure the keychain survives being tossed in bags, clipped to keys, and handled daily.
How do you clean silicone bead keychains?
Silicone beads are easy to clean because they are waterproof and non-porous. Fill a small bowl with warm water and a drop of mild dish soap. Submerge the keychain and gently scrub the beads with a soft-bristled brush, like a clean toothbrush, to remove dirt and grime from the crevices. Rinse thoroughly under clean running water and pat dry with a lint-free cloth. Avoid using harsh chemicals or abrasive cleaners, as they can dull the bead's finish.
Making a durable keychain comes down to preparation and patience. Most beginner frustration comes from materials that don't work together, which is why Barkers Creative Designs offers a full range of compatible silicone beads, focals, and keychain hardware in one place, including discounted options for budget-conscious crafters. Get started with Barkers Creative Designs and build a keychain that stays intact through daily use.